First identify what you are looking at
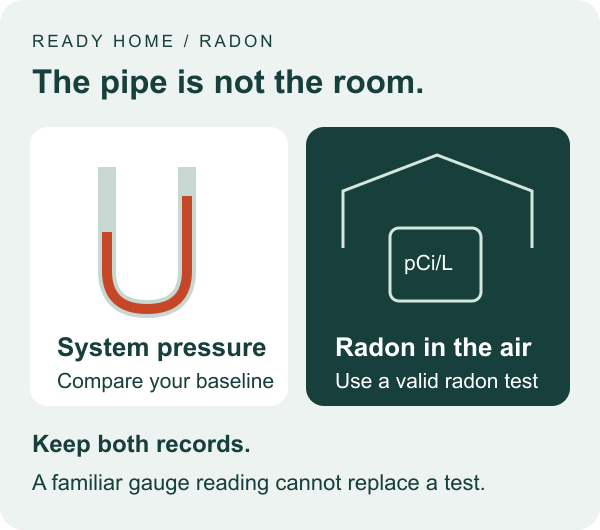
A U-shaped tube containing colored fluid and mounted near a mitigation pipe is usually a manometer. RadonAway describes its U-tube as a vacuum-pressure monitor. It is not the instrument that measures radon concentration in room air. An electronic radon detector, a laboratory test result and a pipe-pressure indicator answer different questions.
Read the device label before interpreting a number. A pressure scale may use inches of water column; a radon result commonly uses pCi/L or Bq/m³. Do not compare the numerals across those units. In particular, a low or zero pressure indication does not mean 'low or zero radon.' If the label is missing, photograph the complete device for the installer rather than deciding what it measures from the color of its liquid.[3]
Look for the installed baseline, not an internet target
Minnesota Department of Health's system-monitor handout identifies an initial manometer reading on the system sticker. Use your own handover record and operating instructions for comparison. There is no pressure number in this article to dial every home toward. The installer needs to interpret a changed indication in the context of the actual system.
If you bought a house with an existing system, gather the installer label, operating instructions, commissioning information and most recent radon test. Missing paperwork is a reason to request an assessment, not to copy a neighbor's reading. Ask the provider to explain which indication should prompt a call and how to read the scale on this particular monitor. A photo of the approved baseline is easier to compare later than a remembered 'about one.'[2]
Equal fluid levels call for attention, not a radon conclusion
For the fan-powered setup illustrated by Minnesota's health department, equal fluid levels indicate the system is not operating as intended. The handout directs owners to consider tubing and fan power, then contact the installer when operation is not restored. Treat this as a system warning. It does not identify the indoor radon concentration or prove which component failed.
Limit your own check to safe observation and the owner instructions supplied for your equipment. Note a known household outage, a visible alarm or obvious disconnected tubing from an accessible dry location. Do not remove the tube, add liquid, open electrical equipment, climb to the fan or repeatedly reset a circuit to make the display look right. An unreadable or damaged indicator also needs service; silence or an attractive number is not a substitute for a working warning device.[2]
| What you observe | What it establishes | Next useful action |
|---|---|---|
| Equal levels or a system alarm | An operating warning, not a radon measurement | Follow owner instructions and contact the installer |
| A change from the documented baseline | A difference worth reporting, not a confirmed cause | Send current and baseline photographs; request interpretation |
| A familiar pressure indication | The indicator resembles its prior condition | Keep normal checks and the separate radon-testing schedule |
Scroll sideways to read every column on smaller screens.
A changed reading is useful information—not a diagnosis
When the levels are still unequal but differ from the documented baseline, send the installer a clear photograph and the previous record. The direction of the change alone is not enough to prescribe a new fan, declare a blocked pipe or assign a radon exposure. Avoid translating 'more suction' into 'better air' without measurements.
Our editorial suggestion is to record a small set of facts, not a speculative repair list. For example: 'At 8 a.m. the fluid positions differed from the handover photograph; power had returned overnight; no adjustment made; last room-air test attached.' That is a hypothetical service message. It lets a professional distinguish an observed change from an owner's guessed cause and decide what to inspect next.
- Photograph: full scale, fluid levels and adjacent system label.
- Timing: when first noticed and any known outage or recent work.
- Warning status: exact alarm wording or light pattern, if present.
- History: original baseline, last service and last radon test date.
The pressure check and the radon test are two separate jobs
EPA advises checking the warning device regularly and retesting the home at least every two years. The first activity helps reveal an operating problem; the second checks radon in the home. A familiar pressure reading does not replace the second job. Follow the post-mitigation testing guide for commissioning or retesting questions rather than treating this page as a sampling protocol.
After a repair, request both an explanation of restored system operation and a plan for verifying radon reduction. Keep the repair invoice and the subsequent radon report together, but label them separately. A technician's statement that the fan runs and a valid radon result are complementary evidence, not interchangeable certificates. Ask your state radon program or qualified provider about a specific elevated result; do not wait for a tube reading to agree with it.[1]
Make the service handoff usable for the next owner
Ask the provider to leave a readable baseline, device instructions, response contact and an explanation of the warning mechanism. RadonAway lists several types of system monitors, including pressure and airflow alarms, so a neighbor's alarm instructions may not describe yours. This guide's U-tube discussion should not be transferred blindly to an electronic device.
Save a dated picture once the professional has confirmed the intended operating condition. Add the date of the next planned radon test and tell other household members where the instructions live. If you are comparing repair proposals, use the mitigation quote guide to separate diagnosis, parts, electrical scope and follow-up testing. Paying for a replacement fan should not leave the original question—whether the home has been adequately assessed—unanswered.[3]
Related reading and tools
Choose the next step for your situation: measure, compare options, or maintain and verify.
- Explore the topicIndoor Air, Radon, and Mold
- Measure the problemRadon Test Preparation Checklist: Before, During, and After Testing
- Measure the problemDigital Radon Detector vs Charcoal Kit: Which Test Should You Use?
- Maintain and verifyRadon Testing After Mitigation: When and How to Retest
- Maintain and verifyRadon Mitigation Quote Checklist: Scope, Contractor Checks and Verification
How this guide was checked
Guides are built from official sources, product documentation, manufacturer manuals, and practical homeowner decision criteria. We do not claim hands-on product testing unless a page explicitly says a product was tested.
- Source-backed editorial review
- 3 cited source records
- Radon and mold decisions can affect health. Follow EPA/CDC guidance and use qualified mitigation or remediation pros when levels, area, or symptoms justify it.
Ready Home Systems is educational and not a substitute for local code officials, licensed trades, medical providers, water labs, or mitigation professionals.
Read review methodologySources and manuals
- How do I know if my radon mitigation system is working properly?U.S. Environmental Protection Agency
- Radon Mitigation System—Important Safety InformationMinnesota Department of Health
- Technical Support: System MonitorsRadonAway
FAQ
What should my radon manometer read?
Use the baseline and instructions supplied for your installed system. This guide intentionally gives no universal target. Ask the installer to explain your scale and the conditions that should trigger service.
Can I convert the manometer number to pCi/L?
No. System pressure and radon concentration describe different measurements. Use a correctly performed radon test to assess radon in the home.
The fan sounds normal. Can I ignore a changed gauge?
Do not use sound to dismiss a warning or a changed indication. Record what you see and follow the provider's instructions. A fan sound also does not replace a radon test.